Connections
Each controller has a USB port which you can use to flash the firmware or your control program. This is described in detail on the next page.
Although the controller can be booted via the USB port, the external 9V supply must be active in order to be able to use the controller’s inputs and outputs.
The sensors in the model are connected to inputs A1 to A8 of the controller. Various analog or digital sensors can be connected to these connections (e.g. buttons, reed contacts, phototransistors, temperature sensors). The sensor is simply connected to the red and green terminals. With some sensors, the polarity must be observed, then the cable marked on the sensor is connected to the red terminal. The terminals marked green are GND or the fischertechnik “-“ connection.
Most sensors can be connected to all inputs. Depending on the controller and input, there are individual restrictions - for example, an ultrasonic sensor can only be connected to A1 of the controller types ftSwarm and ftSwarmRS. You can read about this in detail in the description of the individual sensor classes in the API reference.
Normal actuators (e.g. DC motors, lamps, solenoid valves) are connected to the motor outputs M1 to M8. There are separate plugs for servo motors.
Some controllers have an RS485 connection to map Swarm communication via cable as an alternative. The connection diagram is described in a separate RS485 chapter.
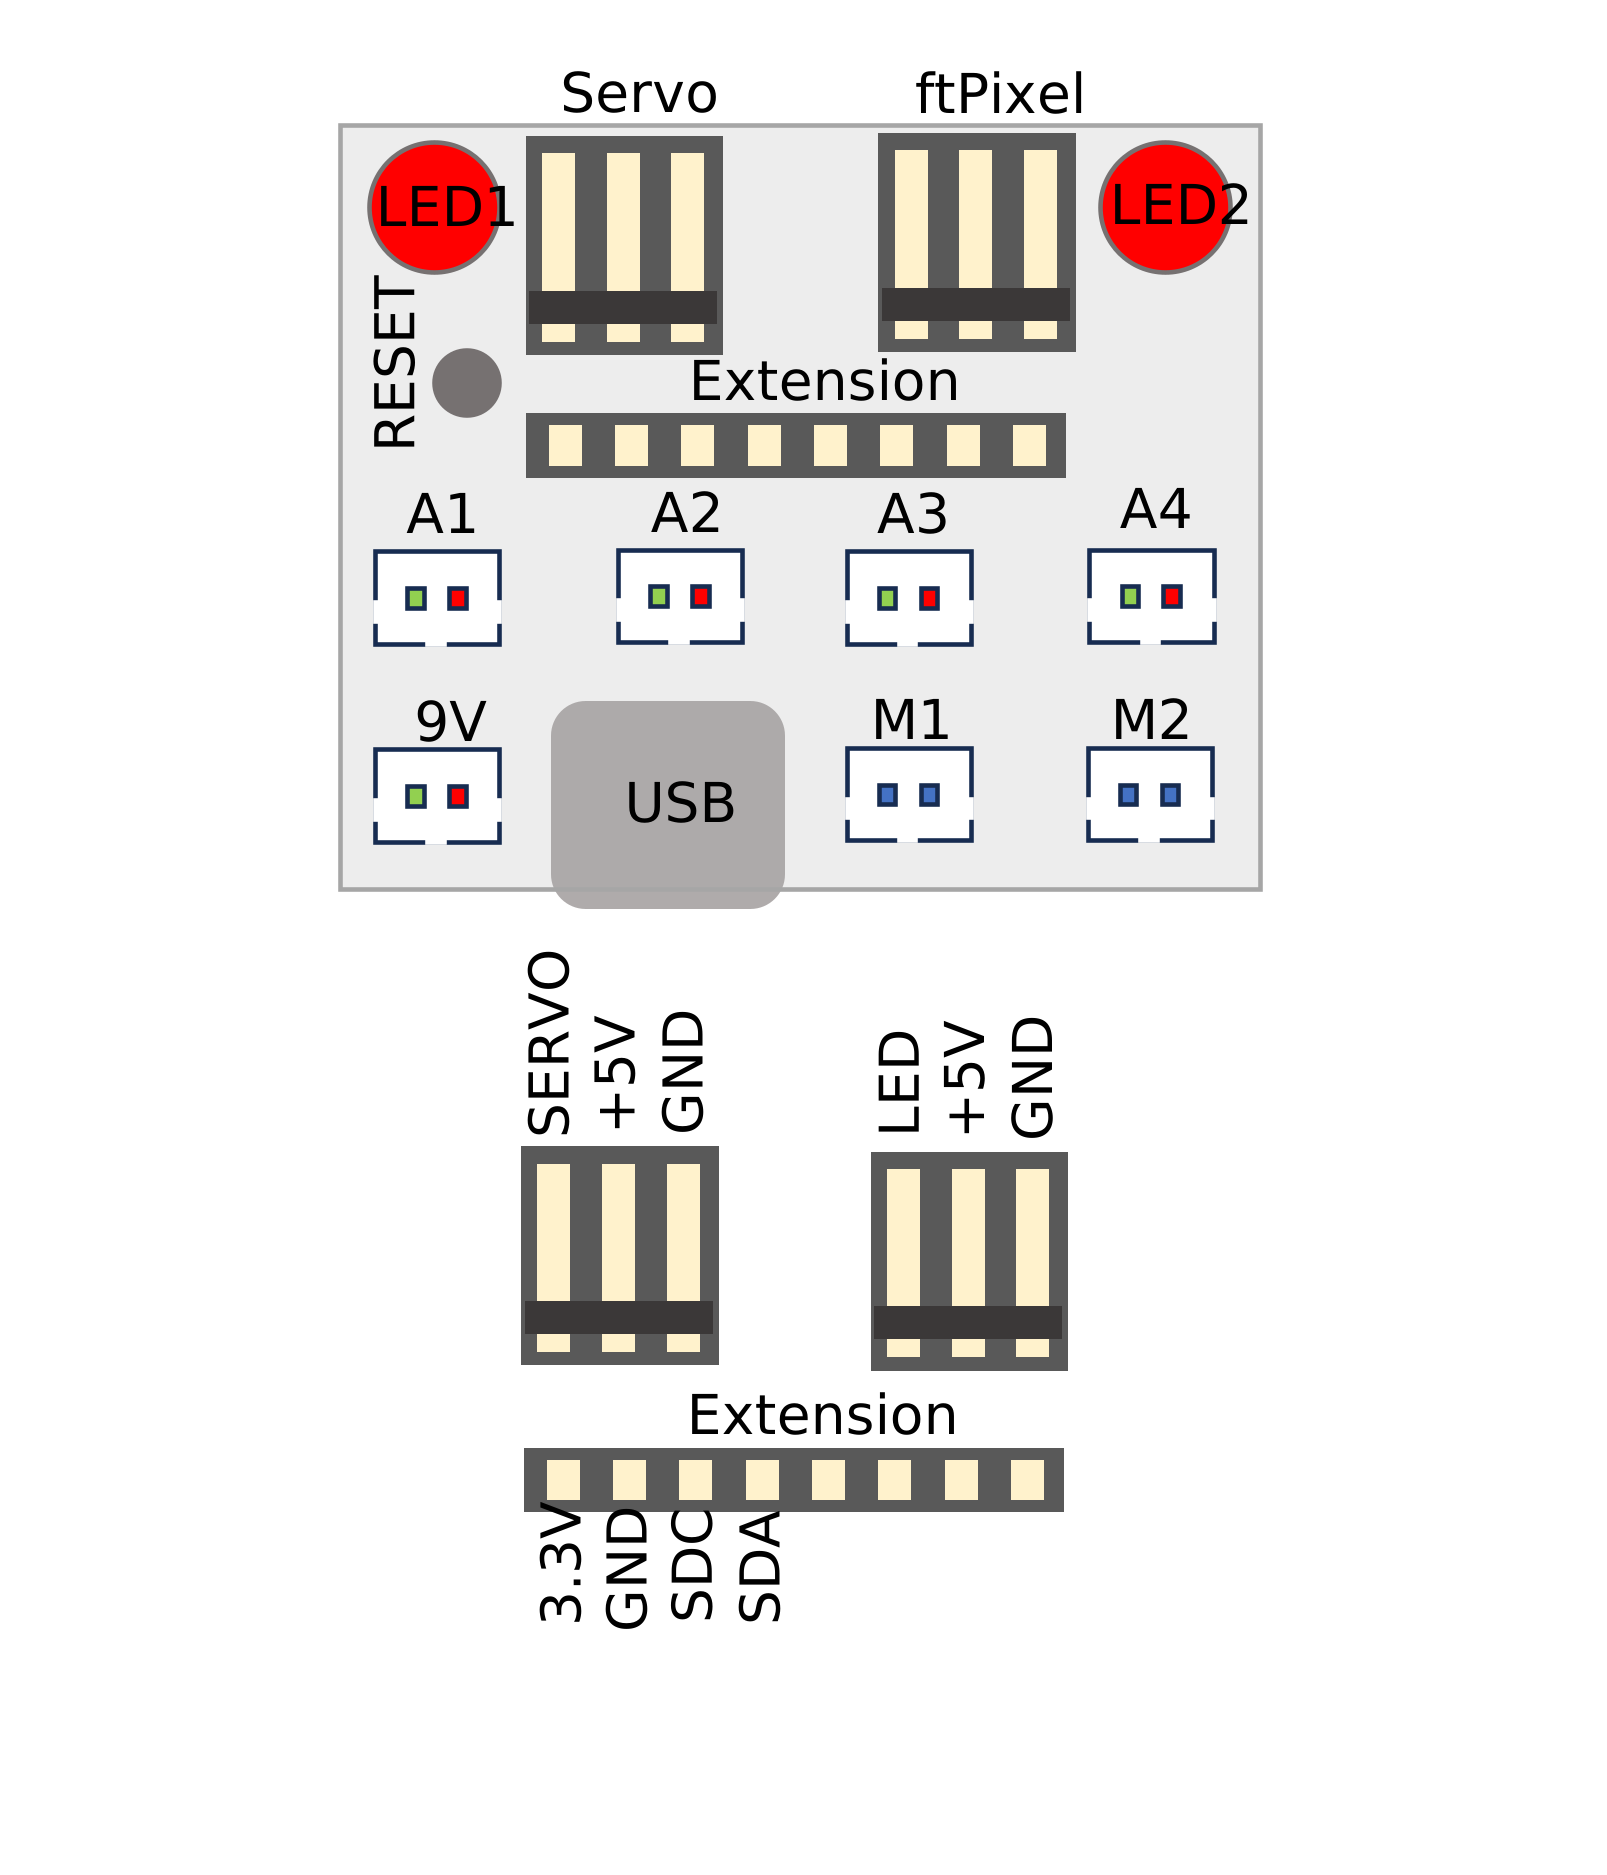
An MPU6050 gyro can be connected to the I²C/gyro connector.
For the connection of ftPixel there is a separate adapter which converts the pin header to a fischertechnik socket.
SD cards can be inserted into the slot on the side of the housing.
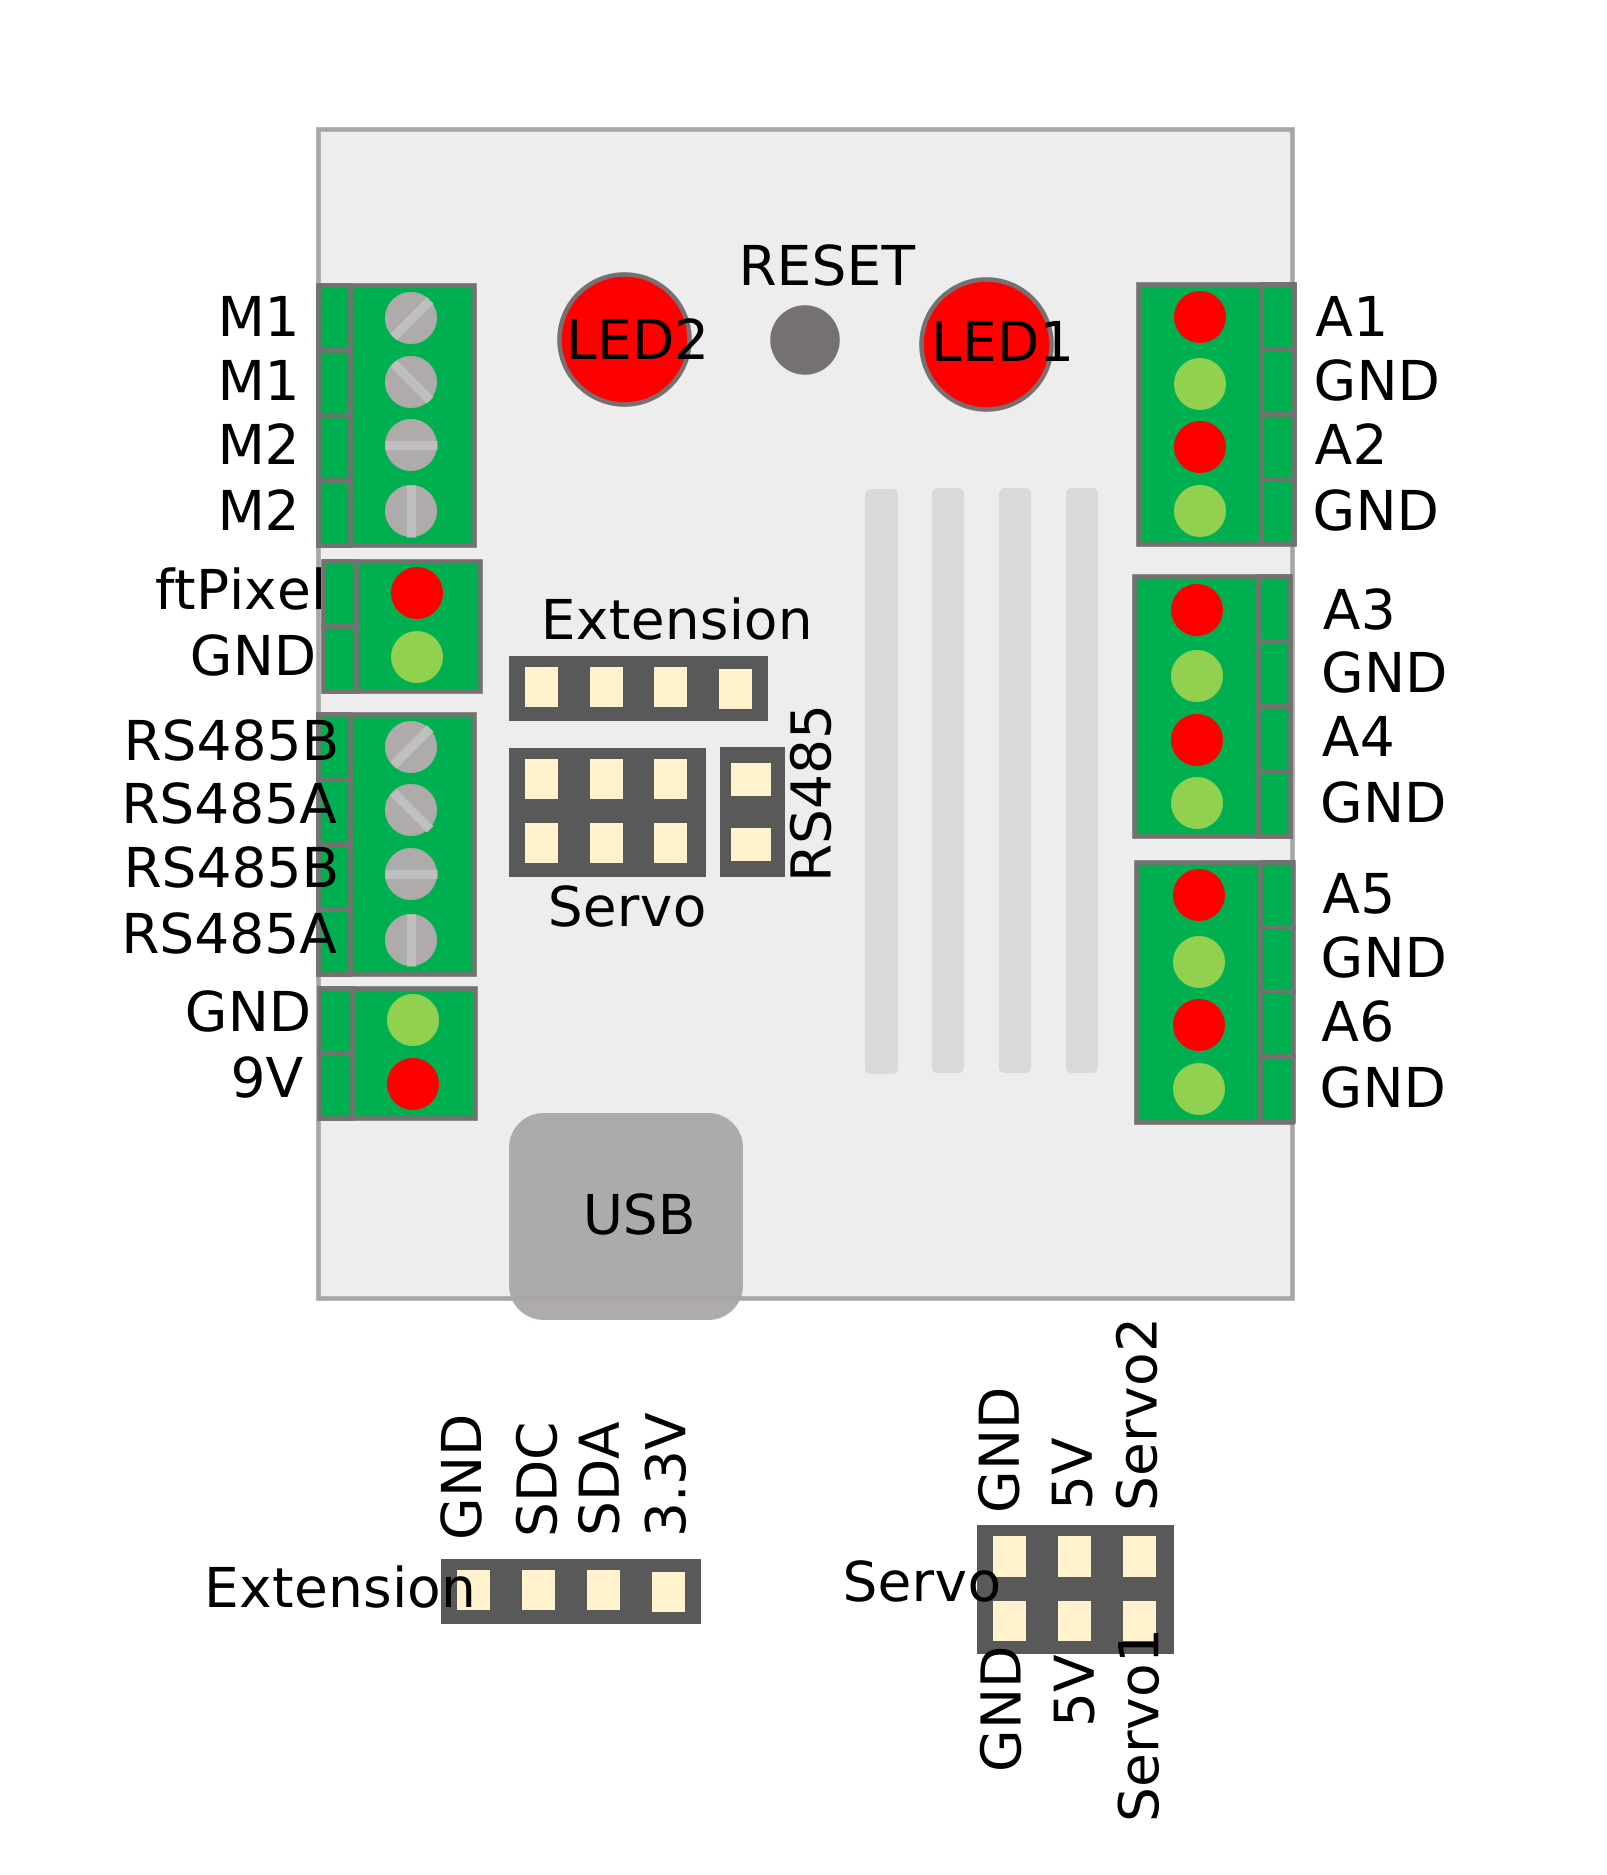
In contrast to the previous model, ftPixel can be connected directly to the terminal strip without an adapter.
SD cards can be inserted into the slot on the side of the housing.
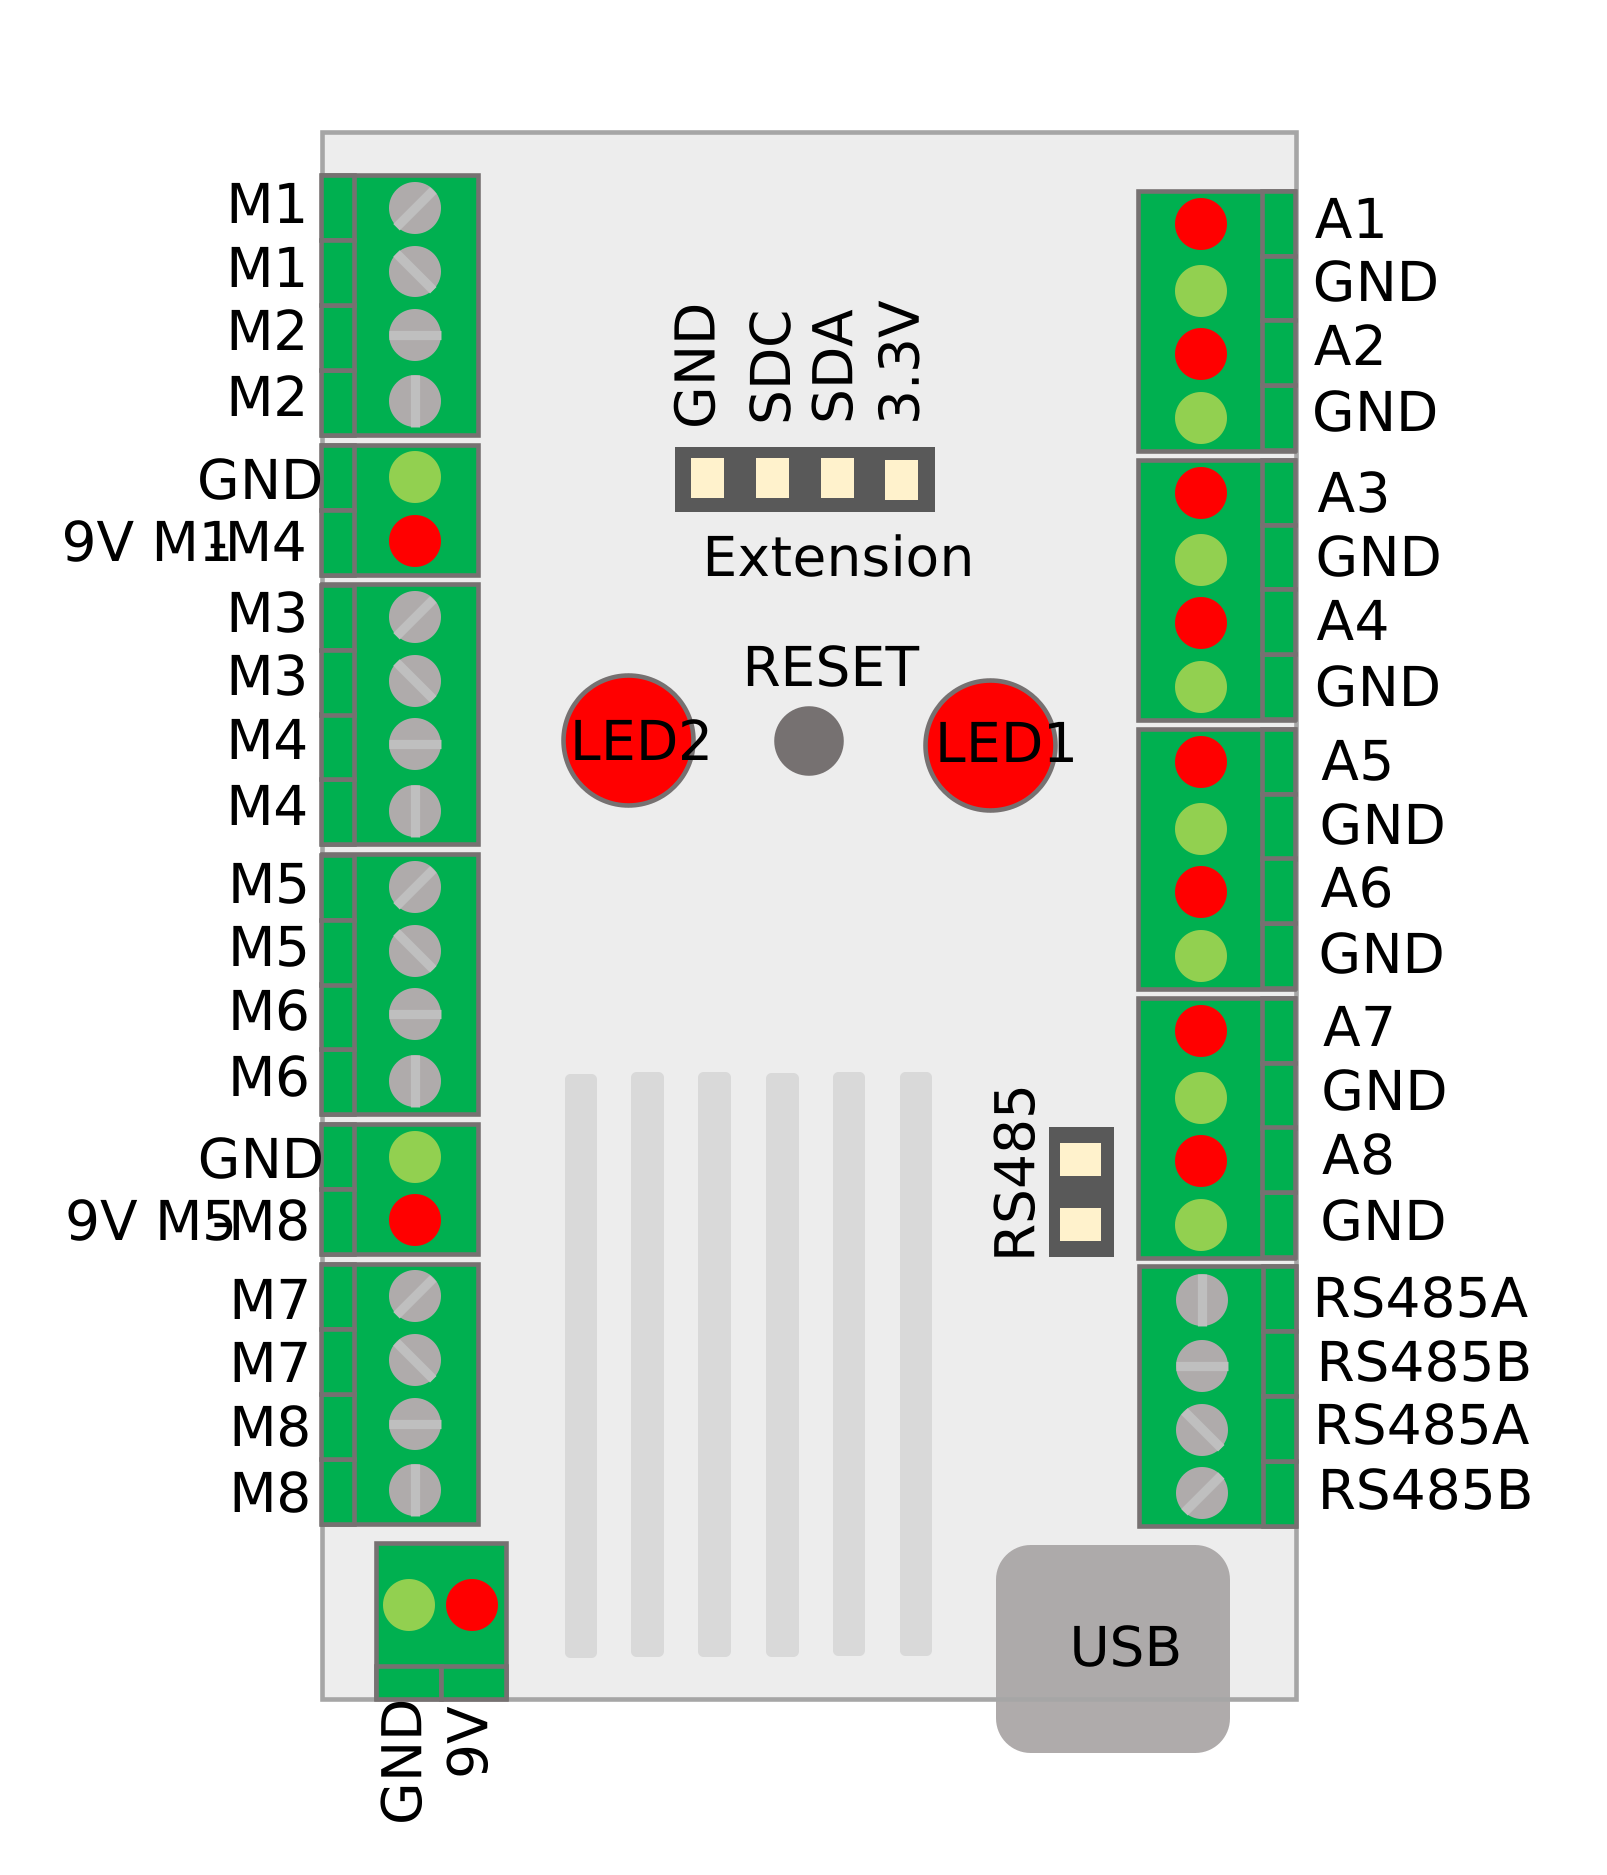
In order to provide sufficient power for the 8 motor outputs, there are three 9V power supplies, all of which must be connected. Depending on the power requirement, this can be done via one or more power supply units.
Please note that the motor output M7 is switched on in your model when booting and when flashing the firmware.
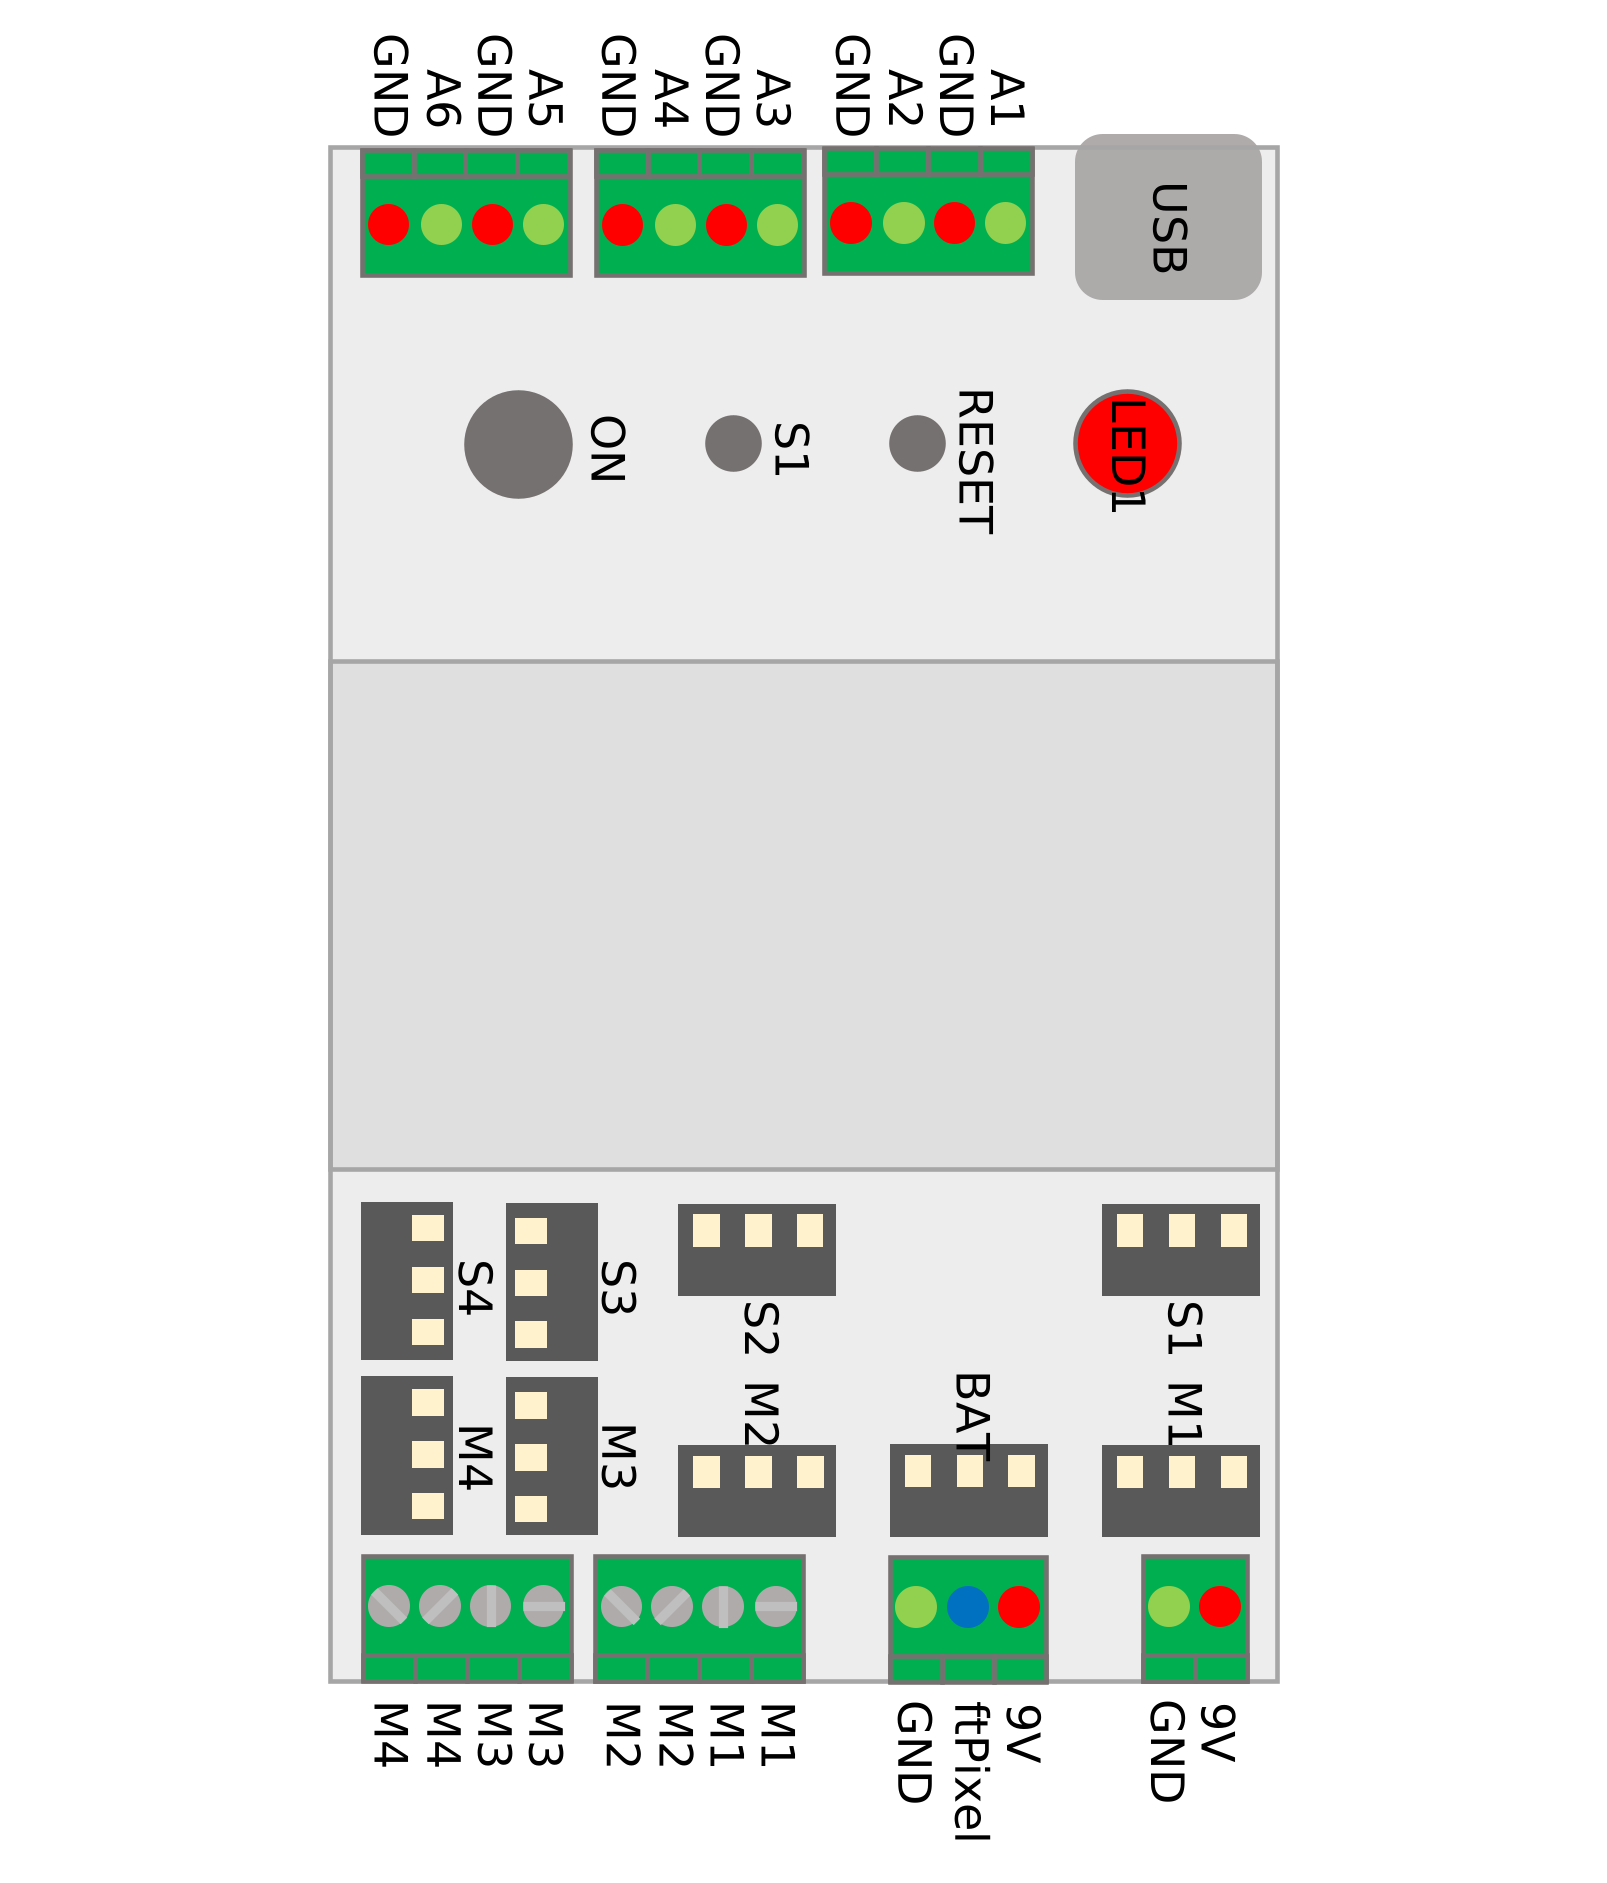
The ftSwarmRC replaces both the 4-channel RC receiver (3246X) and the RC radio receiver (30272) from the 1980s.
Unfortunately, very few of these two receiver types — and the corresponding remote controls — still work. Wheel drives and RC servos can now be used again with the ftSwarmRC. An ftSwarmControl is used as the remote control.
It can do more than the classic fischertechnik RC receivers: It is possible to control a wheel drive, up to 4 RC servos, standard motors, and up to 6 sensors.
Since it is specifically optimized for battery operation starting at 4.6V, it can be powered by the wheel drive’s battery compartment. Please note that you must install a LiPo battery inside the housing to operate the ftSwarmRC.
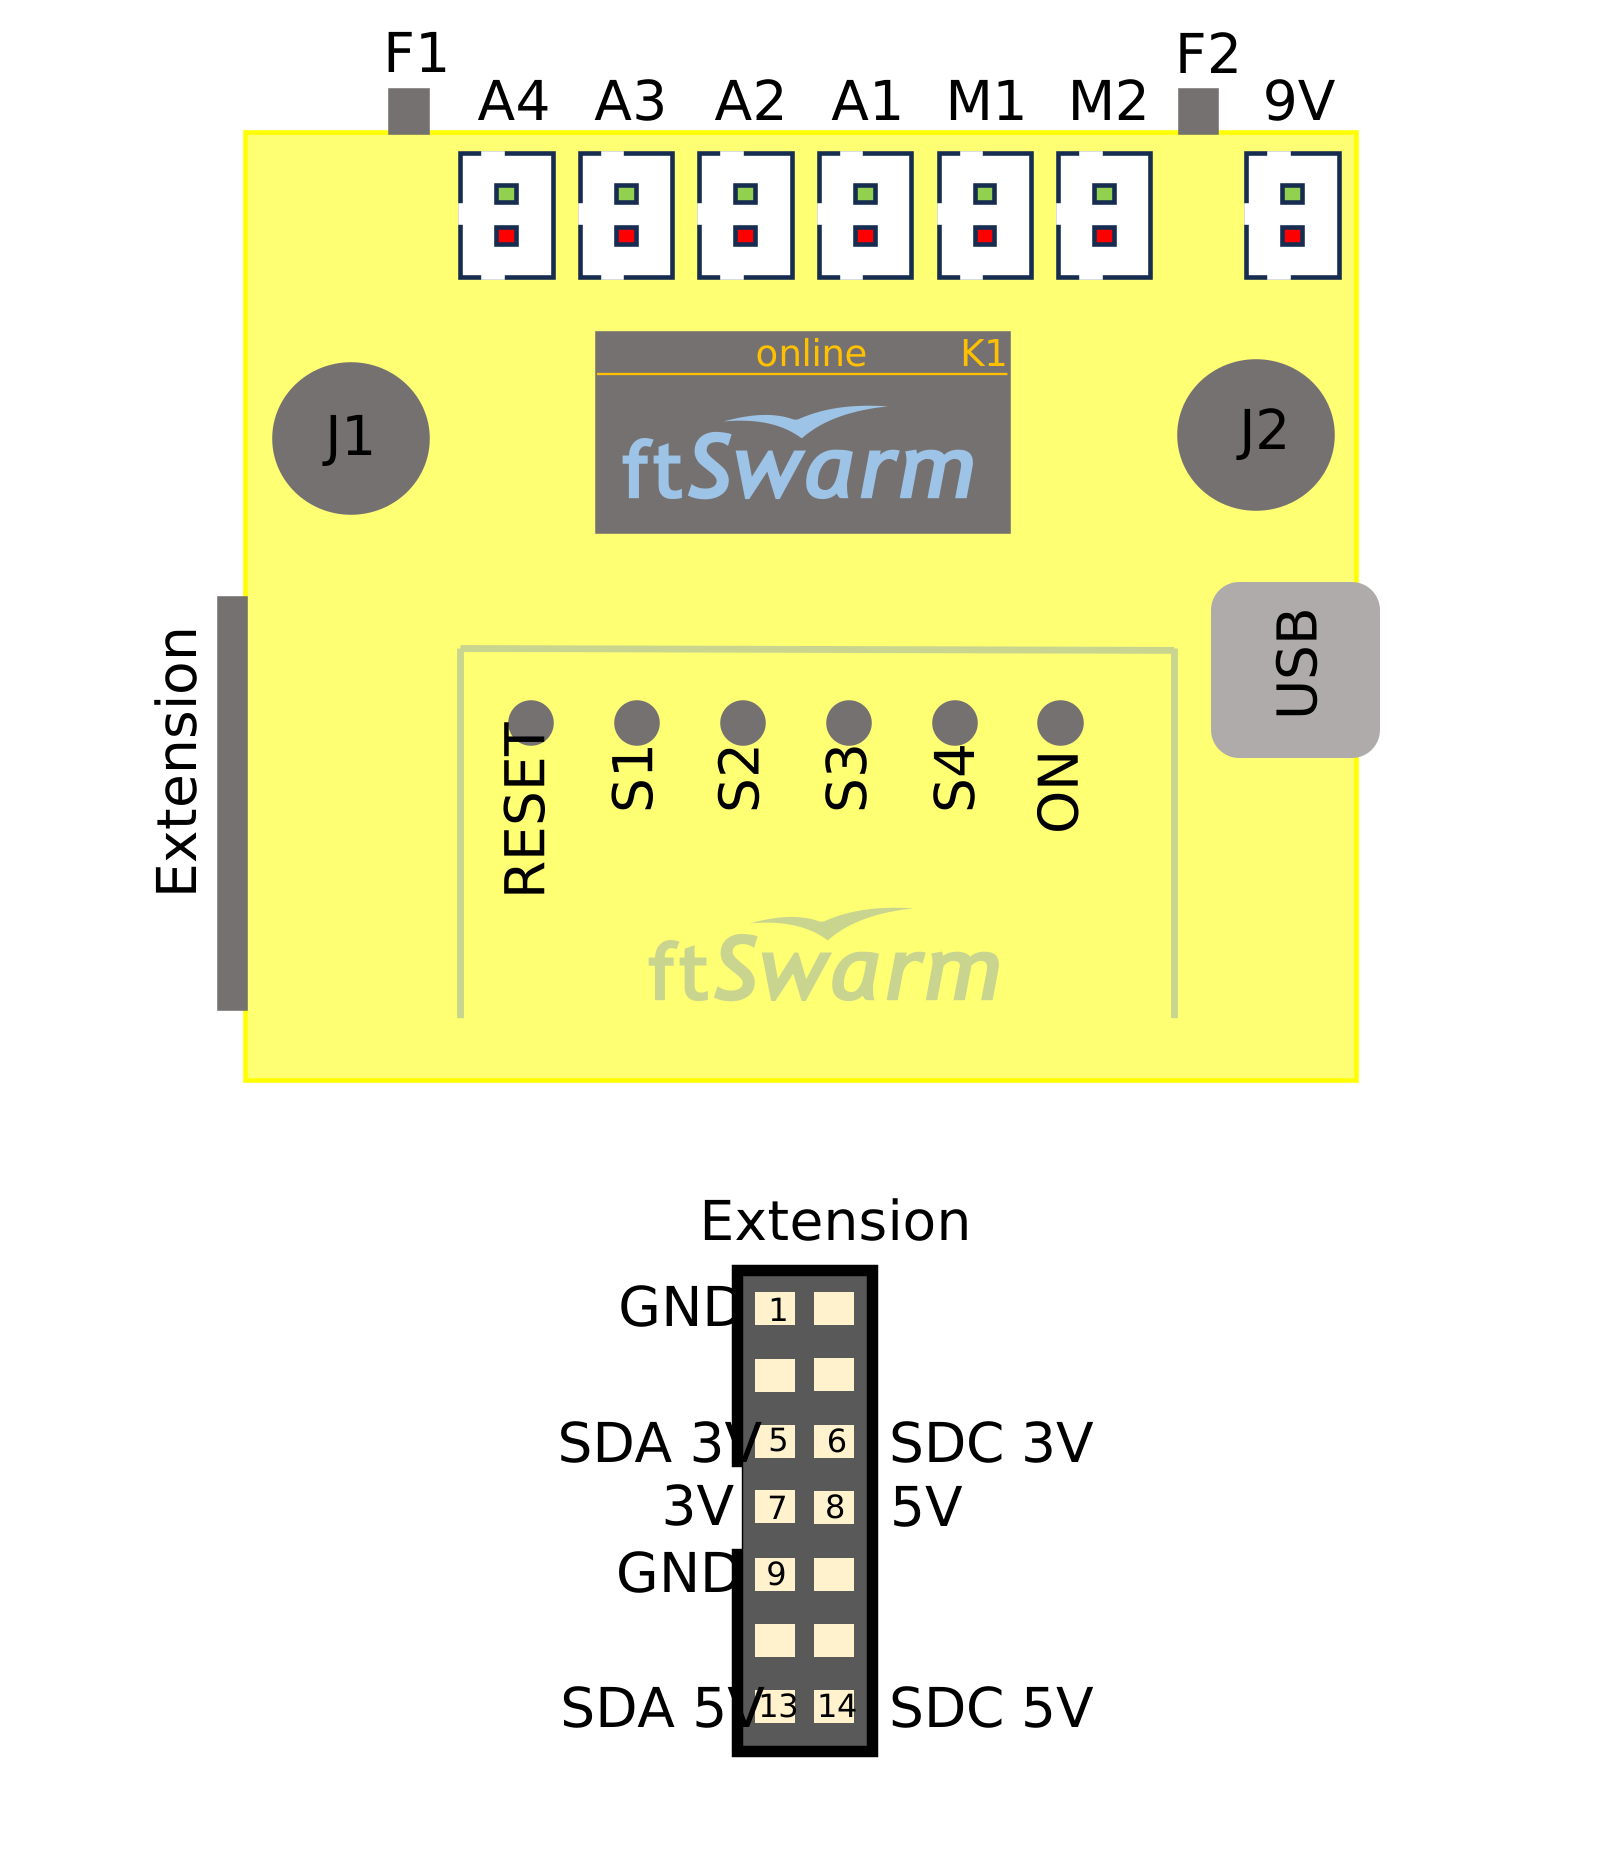
In addition to the normal inputs, the ftSwarmControl also has the two joysticks (J1, J2) and six buttons (F1, F2, S1 to S4).
The ftSwarmControl has an power switch (On) to save the battery in the compartment. 9V blocks and rechargeable batteries can be used as well.
The controller can also be powered via the 9V plug without any battery.
The SD card is hidden in the lower housing; the housing must be unscrewed to change it.
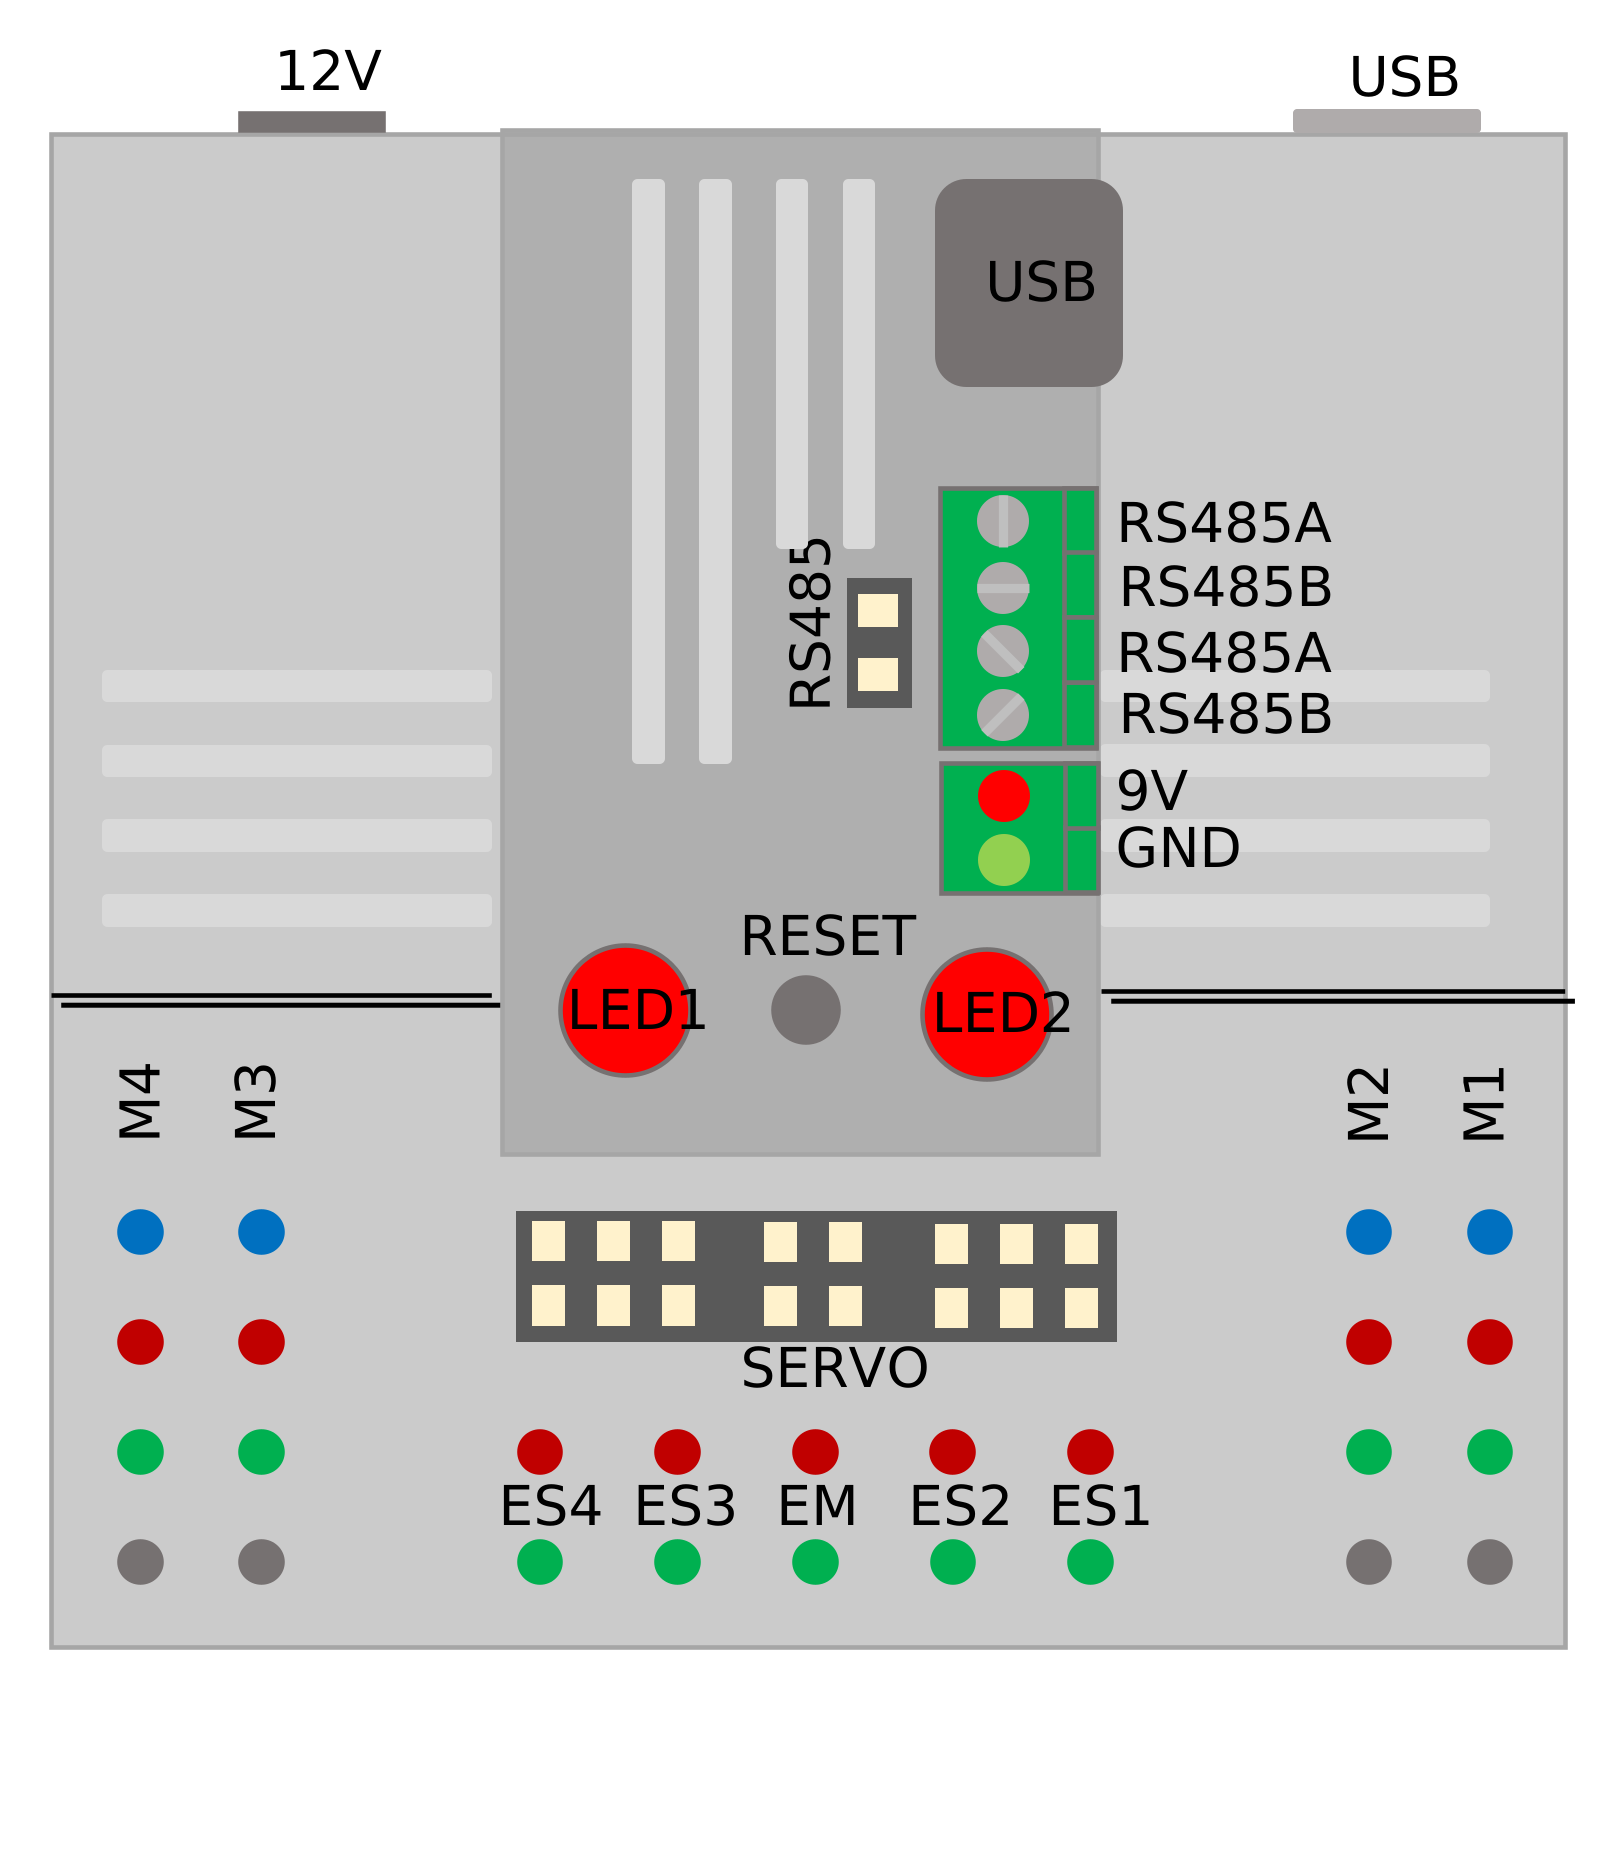
The controller is plugged into the I²C bus of the ftPwrDive and then provides the stepper motors as Step1 to Step4 in the Swarm.
Only digital sensors (push-buttons, phototransistors, red contacts) can be connected to the limit switches (ES1 to ES4) and the emergency stop (EM).
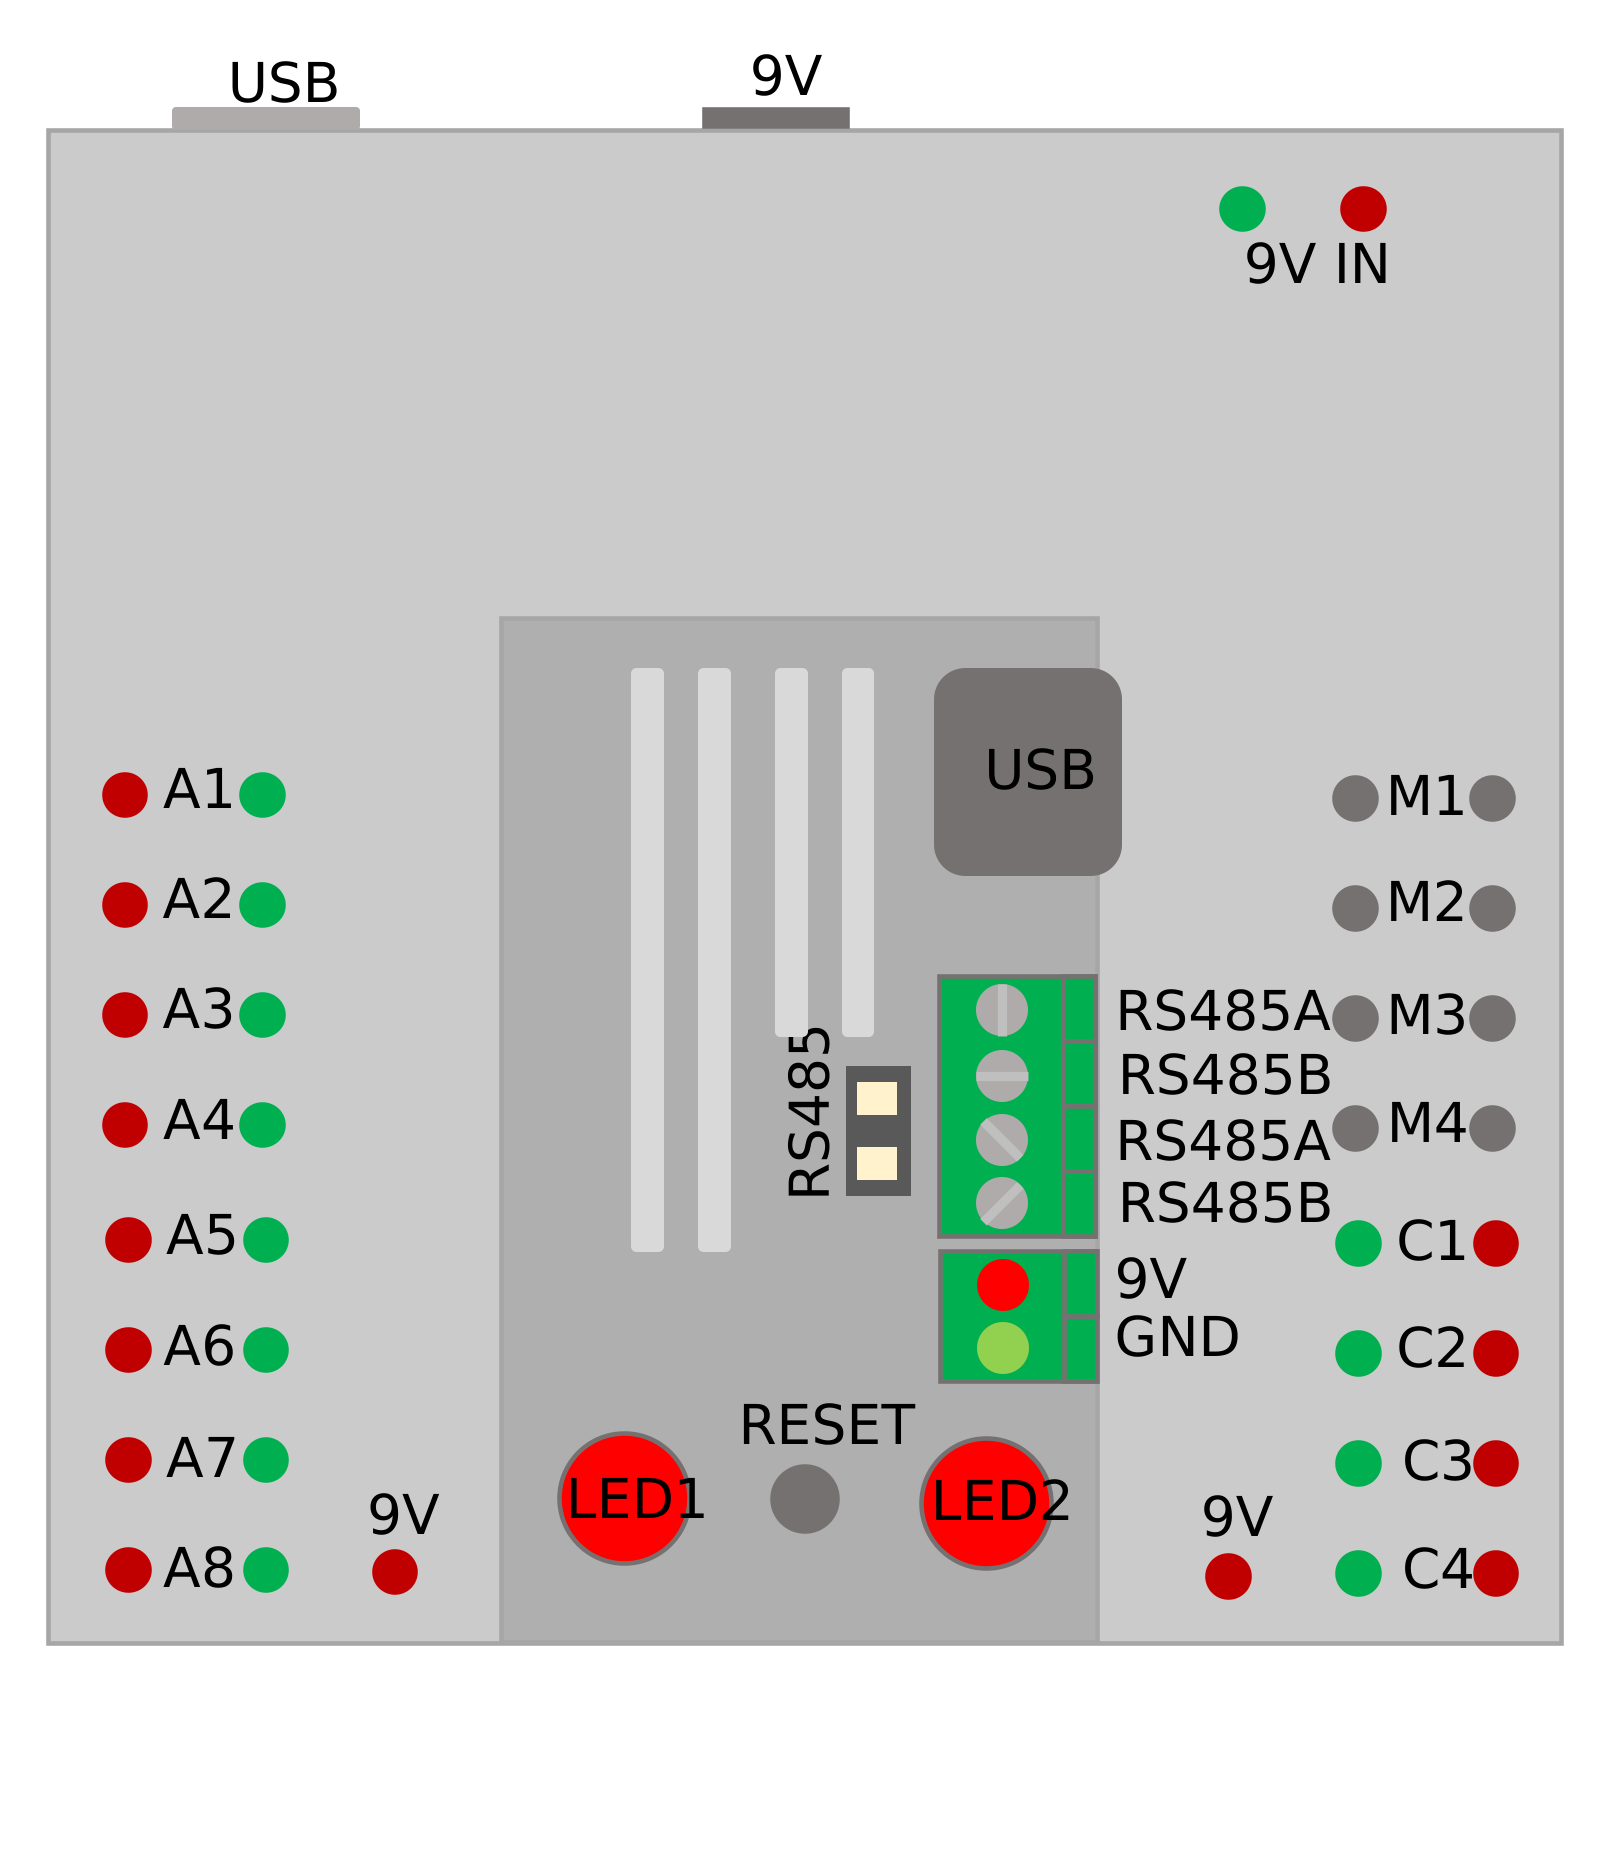
The controller is plugged into the I²C bus of the ftPwrDive and then provides the motor outputs of the ftDuino as M1 to M4 and the inputs as A1 to A8 in the Swarm.
For the 9V power supply, it is sufficient to connect the red 9V terminal to the adjacent 9V output of the ftDuino. The GND/minus connection is made automatically via the I²C connector.
Additionally, you need to flash the sketch ftDuino.ino on your ftDuino. Download arduino-firmware.zip from the release page at github.